Knitting Patterns

Happy New Year!

Well, here it is, the last day of 2019!

I hope that the year has treated you kindly, and pray that 2020 far exceeds 2019 in happiness.

It’s been a strange year for me, and not always the best. I honestly could have gone without a lot of what transpired in these last few weeks, but I’m really glad things are taken care of now.

I’m ending the year with probably a bit more stress than what I started 2019 with, but with less internal organs!

Just kidding, folks! But not really.

So, for the last day of the year at work, one of us will probably be sent home early. It might be me, seeing as how I have to drive through some treacherous roads. It might not be. To be honest, I wouldn’t be too upset if it was. I am dreading driving on my road this morning.

Just in case, though, I’m bringing some project work-who knows where we might end up today?

My project of choice is a simple shawl I just decided to start.

I’m using James C Brett Marble Chunky, my last ball, a size US 9 24″ circular needle and 2 stitch markers.

I cast on 5 stitches.

Row 1: k1, yo, k1, yo, pm, k1, pm, yo, k to the last stitch, yo, k1

Row 2: k1, p to last stitch, k1

Row 3: k1, yo, k to first marker, yo, pm, k1, pm yo k to the last stitch, yo, k1

Repeat Rows 2-3 until you have reached desired size. Cast off in your favorite cast of et voila!

I’ll continue working in mine today, until bed and post more pictures tomorrow.

Here’s to a great new year!

Christmas Crafts

Holiday Tear

The last few days have been full of decorating and creating.

I redid my burlap wreath that I just winged years ago. I wrapped and tucked and it looked ok, until I added the ribbon. Then it looked ridiculous. I got down and I put it away.

I finally decided to redo it this year, and to actually do it correctly. Using this tutorial, I got to work.

As I went around my wreath form, I knew I wouldn’t have enough to go all the way around. The tutorial calls for a 12″ form and mine is 18″. My burlap was also pretty beat up and smelled dusty.

I went shopping for burlap the next day.

I chose this one, and got 2. The tutorial calls for 1 30′ roll, but like I said, mine was bigger. I ended up using both of them.

I have the 18″ form, the tutorial calls for 12″

In the end I was pleased with my work and was already starting to make plans for Valentine’s Day and Easter.

I discovered I had several bows in the house, but being my wreath is natural burlap, it didn’t seem right to add a burlap bow or anything like that. I also couldn’t find my pinecone pins or picks (I found them after it was hung up, of course), and my other bows are way too small. So i had also picked up a larger red bow.

It’s nice and simple. And now hanging up on the wall in the living room.

Next up, seeing what I can do with my plain green wreath that’s collecting dust in the closet.

Christmas Crafts

Fun with Foam

Many years ago, after perusing a copy of Crochet Today (R.I.P.), I had a burning desire to make a wreath. All that was required was to wrap the foam wreath form with yarn and then DC the hell out of a chain and use the natural curves from that to make a rose. It came out nice, but wrapping the yarn around the foam ring was a pain in the ass.I made it with off white so, over the years it has gotten dingy, so we have had to replace it. I have been very lax in that regard. All the crochet wreaths I have seen and liked require a level of commitment I am just not ready for. Seeing all these people crocheting around rings, though…. That seemed easy enough.It isn’t… Not with that size of foam rings.
But commit, I did.Heres what I used:

  1. Yarn. I used two strands Red Heart Super Saver for one wreath, and one strand Hometown USA for the other
  2. Size P hook
  3. A smaller hook, I used an H

Heres what I did:Make a slip knot. Pick up the slip knot through the center of the foam ring. Wrap the yarn around the back of the ring, yarn over the hook and pull through the loop.Now comes the fun part, and the main reason I am very glad the foam rings weren’t larger than they are.. You’re going to leave your hook at the top of the ring. Bring your working yarn around the back of the yarn and wrap around your hook from the back. Your working yarn will be hanging in the front of your ring. These are now your two yarn loops. Wrap the working yarn around the back of the ring and wrap around your hook. Pull the working yarn through your two loops. Continue working around, sort of scrunching your work together to make sure you’re covering the foam ring.Once you’ve made it back to the beginning, and you have sufficient coverage, slip stitch into the first stitch, then switch to a smaller hook, chain 16, then bring it back down and slip stitch into the same stitch.Using craft glue or your handy dandy glue gun, apply decorations as you please. I am using ornaments and other Christmas decorations found in the Christmas aisles at Walmart.Here’s my one finished wreath.And here is the finished camo wreath

Christmas Crafts

Crochet Wreaths

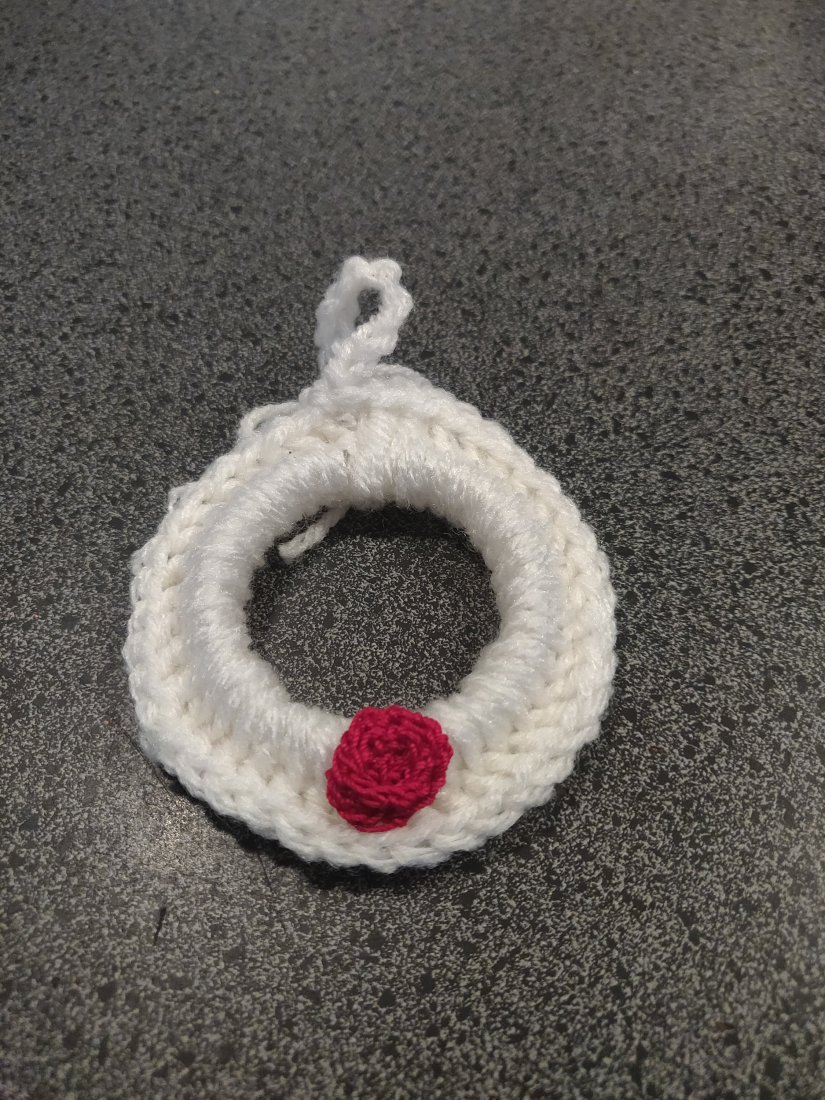
There are a lot of crochet wreaths going around right now. I myself was looking forward to making a few.I just couldn’t decide how I wanted to torture myself.I saw a really cute ornament someone had made and thought I could do that. Then I read she’d used a milk jug ring as the base. I wasn’t too sure that would be plausible for me. I did find a suitable replacement, though.I had a bunch of hair ties already from making scrunchies, so I could always use some of those. Then I remembered that I had bought a pack of shower curtain rings, you know those plastic things you have to wrestle into the holes at the top of the shower curtain? Yea, those.I couldn’t find them, so I went and got another from Walmart. They were around $1.I crocheted around the ring in green, then did a little trim of white around the edge. Add a few chains and slip stitch it back into the work et voila! An ornament with a hanger.I did a chain of cotton crochet with a tiny steel crochet hook, which of course made me question exactly what I was doing with my life to have been brought so low. I rolled it up into a little rosette and attached it to one of the wreaths using craft glue that dries clear.
Christmas Crafts

Fun with Glue

I am a very big fan of the hot glue gun. I am not, however a fan of the glue in the glue gun. Especially the tails I seem to drag everywhere once I’ve glued whatever it is.

So, I am on medical leave after surgery and I am going stir crazy. When I go to the store, I experience pain in my abdomen, which is to be expected having had an internal organ removed. Obviously, it isn’t anything life threatening and sitting down and relaxing helps it a lot. That said, I haven’t done a lot of shopping at all. Short trips and someone is always with me.

Until today.

Now, I’m not trying to injure myself or anything, but I’ve been looking forward to doing something by myself, finally. My first two days post surgery, I didn’t go to the bathroom by myself. Even in the middle of the night, my husband would wake up and escort me to the bathroom. I get hollered at for reaching for things on a shelf that’s higher than my head. I practically have panic attacks when something I need or am putting away is on the top shelf. We were at the store and I grabbed some whipping cream from the top shelf and all I heard behind me was, “TOP SHELF.” In the Dad voice. It was embarrassing.

The trip today was short, but I did manage to walk the length of the store, as my goal was to get to the Christmas decorations. I wanted to get a deer head ornament we had seen at Walmart in another town. I had a stroke of genius, which you’ll see tomorrow.

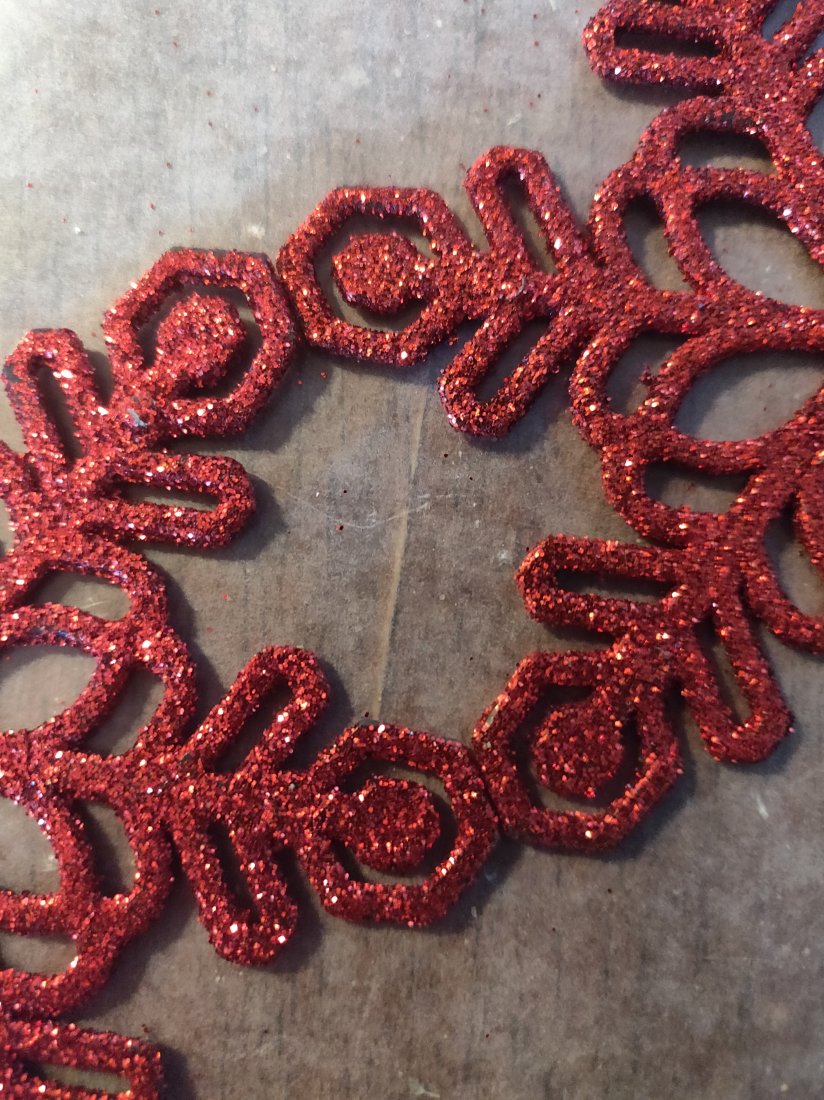
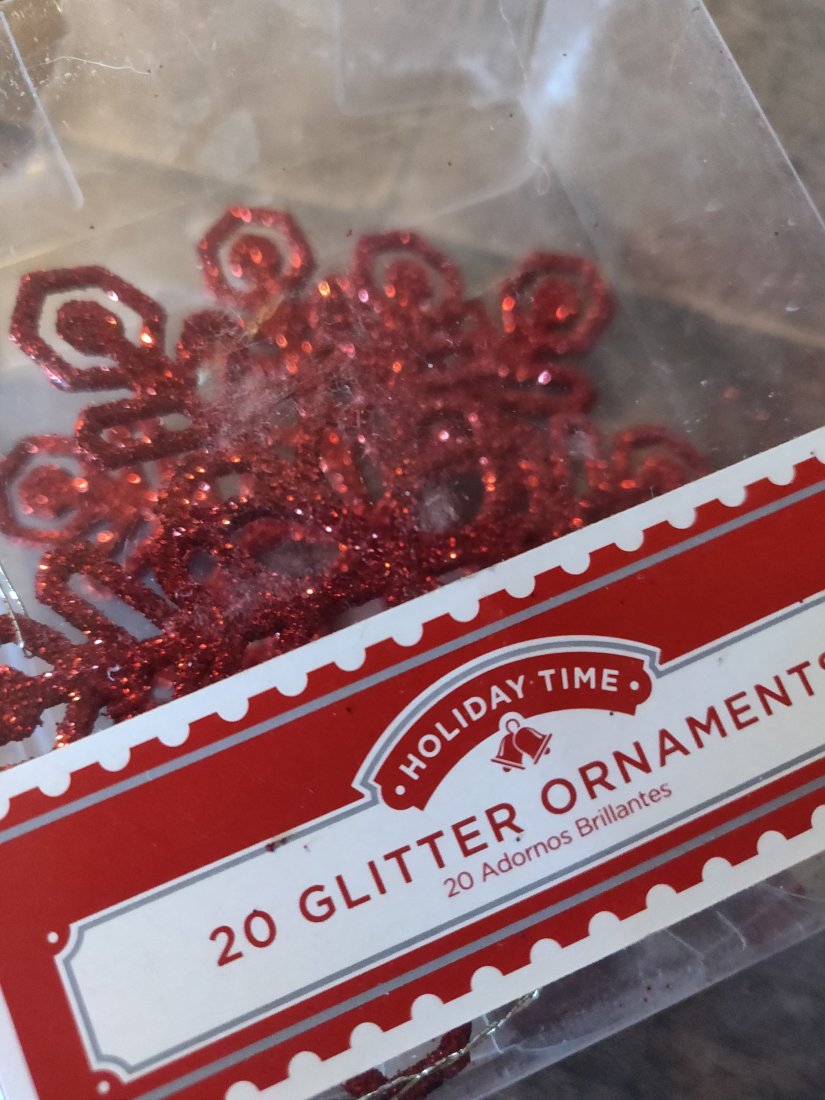
They didn’t have what I was after at my Walmart, but I found some cute stuff. Including these Glitter Ornaments.

This is how you know I am bored. I am known for saying that things like glitter and tinsel were creations of the devils minions and were part of Satan’s grand plan for world domination. But I have purchased more glitter in the last few weeks than I have ever had the displeasure of looking at.

So, I bought some. And a bunch of other stuff. These were going to adorn various wreaths I made or bought. Then I started thinking. I took them out and laid them out on the bed and I made a wreath with just the ornaments and I liked it.

Here’s what I used:

Hot Glue Gun

Pack of 20 glitter ornaments

Scissors

Wax paper

Here’s what I did:

I cut all the gold hangers from the ornaments- the way they are arranged, the wreath won’t hang right where the hangers were attached.

Arrange the ornaments in a circle on the wax paper. As the picture shows, these ornaments have pentagons on the ends, so they line up nicely, and using those as the connector points makes it easy to arrange them into a circle. Glue the ornaments together at the points that are touching, using enough glue to cover both parts.

Once the glue has set and cooled off (remember, it IS hot glue, a lesson I re-learned after sticking my thumb into the damn glue on one of the ornaments), peel from the wax paper and use the scissors to trim any glue that’s visible from the ‘front’ side.
Add a ribbon or string to hang wherever you’d like!

Here are mine. I used 6 ornaments for each wreath and plain white ribbon for the hangers.

Uncategorized

Post Op Blues

About 5 days ago, I had my gallbladder out. Since then, I’ve been going back and forth showing my ‘girl power’s and ending up kicking my own ass.

I am highly motivated to return to normal, so I jumped at the chance today to do my normal routine (outside of returning to work, because I don’t think I’d be able to escape my captors).

I set the alarm for 3 AM. Barely any trouble getting myself out of bed. This is good, because there have beendays I’d like to knock some teeth out for helping me sit up.

I have been without my post op pain meds for over 24 hours at this point. Things are great.

I did it all, and was so excited. Until…

I went to put on my warm boots. See, I got cocky. Again. Instead if slipping on my high boots, I decided I would just do what I would normally do and put the warm boots on. Big mistake.

That’s what did me in. I lamented to my husband, ” I cannot have hit my limit before 4 AM!”

I went and filled his water and coffee cups. A lot slower than normal, because I do have weight restrictions of what I am allowed to lift, and I’ve been sticking to them. I went outside, and it’s cold!

I came back in, a little dejected. I mean, I know I shouldn’t be back to normal, yet, but to be honest, I am bored. Don’t get me wrong, it’s nice being taken care of, but I was never so glad as I was the first time I got to pee alone, and I mean, there wasn’t someone standing outside the door continually asking, “Are you doing ok?”

With all this down time, I’ve made a lot of stuff. I’ve learned a lot too. I’m sure, I’ll still have to relearn it again, because I’ve learned how to do this stuff several times already, but I’m learning!

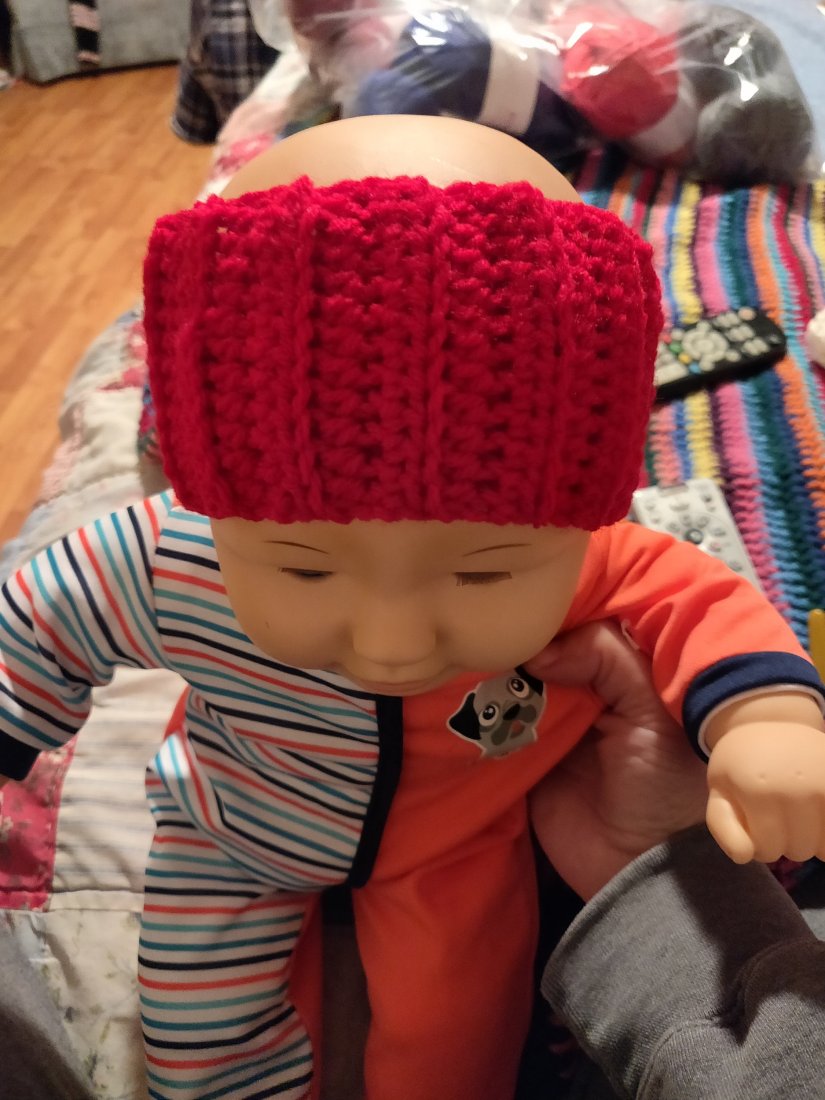
Here’s something I’ve whipped up really quickly just this morning

Supplies:

Worsted weight yarn

Size I, 5.25mm crochet hook

Yarn needle for weaving in ends

Here’s what I did:

Row 1: FHDC 12 stitches, Ch 1, turn

Row 2: hdc in blo of each stitch

Repeat row 2 for a total of 32 rows

Slip stitch ends together, through the blo of the last row starting edge.

Weave in ends

Voila! A baby sized headband.

Stunt Baby is my model, his head is approximately 20″ around, if I remember correctly. Leave it plain, or attach the accoutrement of your choice!

Uncategorized

Harry Potter Extravaganza

I was recently asked to make a Harry Potter themed hat and scarf. Specifically a Gryffindor set. For an infant. A preemie infant newborn.

Yikes!

Now, I know babies come in all sizes, but this kid was born at the same gestational age as my oldest boy, who will be 21 (!!!) in January.

Babies heads are small, but a preemie head, that’s up in the air.

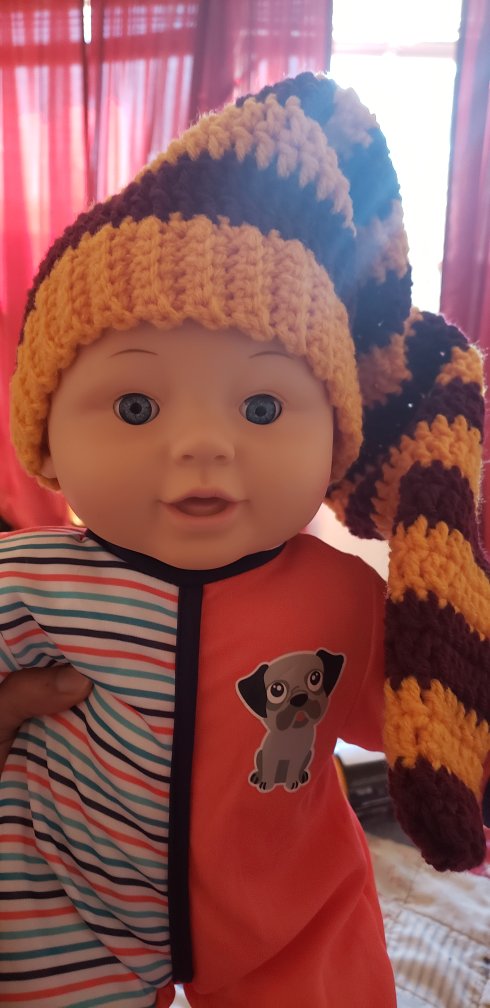
I managed it, though. I used a pattern by Nancy Anderson from Red Heart Yarns, which is now part of the Yarnspirations family.

Its the Baby Elf Hat and it’s free!

I did make an adjustment on the brim, to make it a teensy bit smaller around, but not much.

I finished it, lickety split, but realized it wouldn’t be very convenient to go back and forth to see if it fit. So I bought a babydoll. I didn’t just grab whatever baby, though. I looked and tried to make sure it would be close in size to an actual baby’s head, but not so large that the hat wouldn’t fit the baby its being made for.

I think it came out pretty well. All thats missing is the tassel, which I’ll make once the scarf is done.

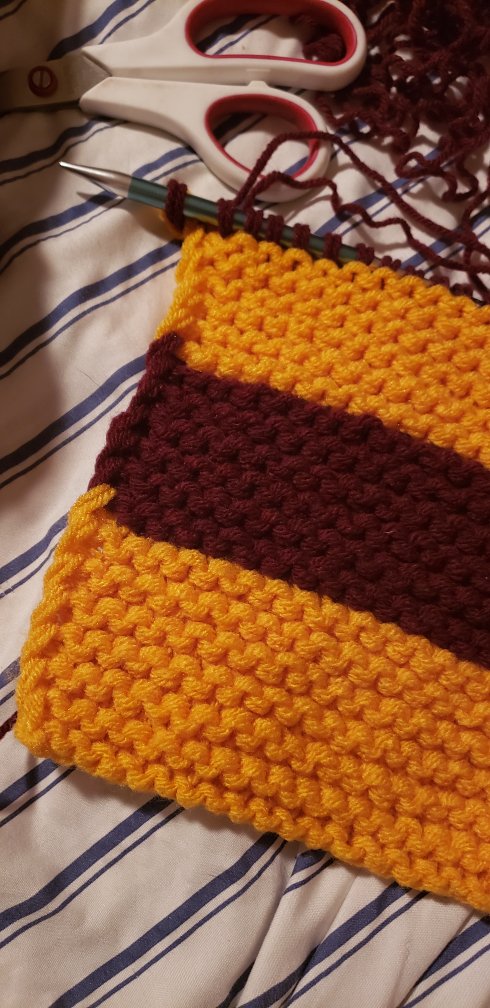
Now, I have had a really thick Gryffindor scarf since last year, and I was totally prepared to finish it up a f just use that. However, after much discussion with my friends, and myself, I decided to just start from scratch.

See, the color in the scarf I made last year doesn’t match the hat. And I’d really like for them to match.

I used Red Heart Super Saver in Claret and Saffron. The Saffron is a shade thats new to me, or at least to my Walmart. I picked it up thinking it was Gold, and when I asked my friends, they thought it was a better match color wise.

Also, I was going to do it single stranded, but quickly changed my mind.

Supplies I am using:

2 skeins of each color, yarn is held double.

Size 11 knitting needles

Cast on 25 stitches, or however many you want.

Row 1: knit

Row 2: sl 1 st purlwise, knit to the end of the row

Row 3-12 repeat row 2.

Change color.

Repeat rows 1-12

Continue in this manner until desired length is reached, making sure there’s enough yarn for fringes or tassels.

Uncategorized

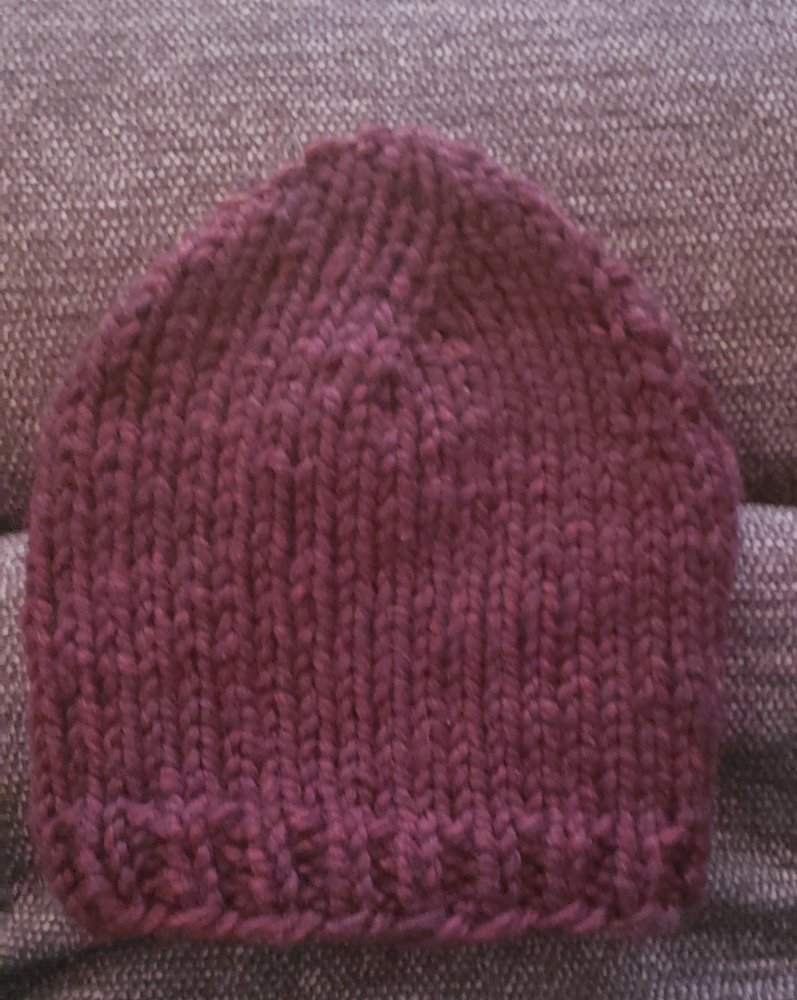
Basic Chunky Beanie

Its not a great secret that I have a lot of yarn that I dont know exactly what it is.

Occasionally, I can go through my Ravelry stash and figure it out. However I have a yarn that I was sure was one kind, so I didn’t have to look it up, but since I’ve used it in this hat, I’m pretty sure it isn’t what I’ve been thinking.

A quick gander through my Ravelry stash tells me I’m right, it’s not what I thought it was.

So, here it is, my basic knit chunky beanie:

Supplies:

1 skein Lion Brand Wool Ease Chunky

Size US 13, 9mm needle, for working in the round

Stitch marker

Yarn needle for weaving in ends

Cast on 38 stitches. Join for working in the round. Place stitch marker, if using.

K1, p1 ribbing for 4 rows

Row 1: k all stitches

Repeat until work measures 7.5″ from cast on edge. Directions between **, repeat to end of row

Decrease as follows:

R2: k2tog, k17

R3 and all odd rows: k all stitches

R4: *k7, k2tog*

R6: *k6, k2tog*

R8: *k5, k2tog*

R10: *k4, k2tog*

R12: *k3, k2tog*

R14: *k2, k2tog*

R16: *k1, k2tog*

Cut yarn, weave through remaining stitches , pull tight and tie off.

I’ve added a pdf file to my Ravelry shop. For $1.25, you can download to have your own ad-free copy.

Uncategorized

Friday Foods

Fridays in general are pretty special around here.

My husband is off (unless he’s on a fire), most times the kids are home, and now, I’m off in the morning.

Since it’s his first day off after 40 hours, husband likes to take it easy and since we aren’t running around trying to not miss busses or rides, everyone takes their time getting up.

So, we sort of do breakfast well on Fridays. Sometimes, it’s a big show, with two of us in there cooking and a spread that would make breakfast in hotels look like a snack.

Other times, it’s just some stuff tossed together. Today was one of those days.

We are low on funds and basically making stuff up for dinner.

A quick discussion about the tube of Jimmy Dean sausage and dozens of eggs and we determined just to cook it all together.

But plain eggs and sausage, while delicious, is plain!

So I looked around for what else I could add in.

My garlic had about 4 cloves left, so I diced them up and tossed them in with the meat. I also grabbed some cilantro and a serrano pepper.

Which, by the way I planted out in my garden and hasn’t shown any signs of anything outside of some leaves, so I’m having doubts that it’s not basil, because theres a bunch of stuff in another plot that is basil, and I thought it was something else.

Anyway, it turned out pretty well, with just a touch of spice.

Here’s what I used

1 tube Jimmy Dean ground sausage

4 cloves garlic, diced

1/4 C chopped cilantro

1 Serrano pepper, seeded and diced

Eggs, mixed well

Here’s what I did:

Brown sausage in a large pan over medium low heat.

Add in garlic, cilantro and pepper, cook until sausage is no longer pink.

Add in eggs, stirring often, until eggs are cooked well.

I seasoned lightly with black pepper.

Serve warm.

Wednesday Wonders

Wednesday Wonders

So, here’s something for you. I started writing this post a few days ago, and it didn’t get saved somehow. Not one lick of the spectacularness was saved, though you know it’s supposed to save every few minutes. It’s just gone from the list.

It was pretty funny too, considering it was about food. I usually try to save those for the Sunday Dinner post, but I made it Sunday night and I was pretty tired.

Anyway…

I have a love/hate relationship with brown rice. The hate part is that I’ve cooked it correctly maybe 3 times since I learned if its existence.

One of those times was on Sunday. Sunday was a weird day. We went and got some stuff to finish the chicken coop run. Then I went outside to pull weeds. See, the Mister said he felt like having a bonfire, but the backyard looks like the jungle from Tarzan or the Jungle Book. All these damn bushes, some as tall as I am, and 98% of them are part of a family of trees that I am known to be allergic to, so if I go out bare armed or start pulling weeds without gloves on, I get itchy. Not a good itchy that can be helped by a couple of scratches across it. No, it’s a burning itch. Like that has me in the bathroom washing up to my elbows. Its unpleasant.

You can imagine then how I felt when I had been outside pulling weeds for a while, and the person who wanted to start a fire in the yard and needed the weeds cleared out was in the house sitting on his ass.

I made sure he knew what was up and I went out and pulled weeds in the garden bed. Which by the way is growing vegetables, people! And melons! It’s crazy how I haven’t managed to make it look like the earth had been salted back there.

By the end of the day, his hands have blisters and I can barely stand up my back hurts so much. But, I had a plan. See, my friend, Sharon posted the other day about having empanadas, and that of course made me want some.

I went back into the house and started cooking. Everything was going good, until I realized I hadn’t bought any cilantro. Thankfully, I had some growing in front, so I basically decimated my entire crop for dinner.

Like, I said I was barely able to stand, so I said screw it, I’ll just not make empanadas, we’ll have the meat and tortillas and voila!

Except that my daughter has eaten us out of tortillas. Like there were two left. During the summer, it was easy, she’d hang out in her room and forget to eat lunch. Now, she’s out here every morning like she’s Julia Child cooking up some kind of something. And she has deemed that lunchtime is now anytime between noon and whatever time it is when mom starts yelling at your for getting something to eat because it’s almost time for dinner.

I wasn’t a loss. The only thing I could think of was arroz con gandules, but I dont have all the stuff for that and over an hour round trip to the store was not happening. So, I improvised. And it turned out pretty well.

Here’s what you need:

2 cups uncooked brown rice

3.5 cups water or chicken broth

1 can Goya gandules

2 packets Goya Sazon

1 can Rotel Mexican style tomatoes

2 tbsp cumin

Put everything in the electric pressure cooker/instant pot. Cook at normal rice setting.

I let the pressure go down without venting. I find that most times this is best with rice.

This was some of the best brown rice I’ve ever made.

I had zero hope that it would turn out good at all, so I dont have pictures and there was hardly anything left, so I guess it must have been liked by everyone.

Of course after this gets posted the other one I was working on before that disappeared, is now showing up on the list.